
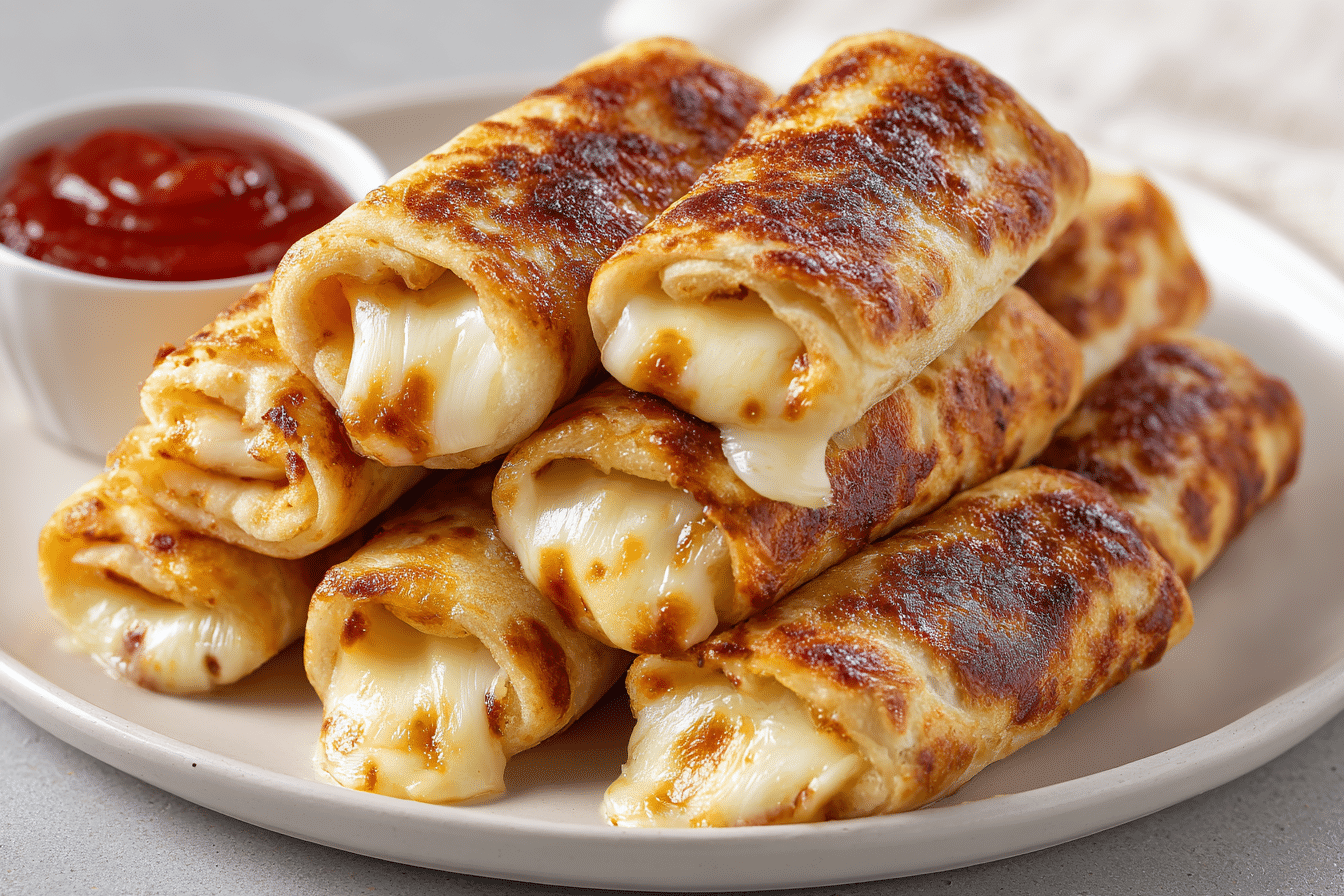
Easy Grilled Cheese Roll Ups are a fun, versatile snack or lunch idea that transform classic grilled cheese sandwiches into bite-sized, rolled-up perfection. Each roll delivers warm, gooey cheese encased in a crispy golden exterior, making them irresistibly satisfying. Quick to prepare and endlessly customizable, these roll ups are perfect for busy weeknights, kid-friendly lunches, or casual get-togethers where everyone wants a hand-held cheesy treat.
The magic of this recipe lies in its simplicity: ordinary bread, melted cheese, and a touch of butter or oil create a crunchy yet tender snack with oozy cheese in the center. Optional add-ins like ham, turkey, or vegetables can turn these roll ups into a complete meal, while seasoning the bread or sprinkling toppings enhances flavor and texture.
Ingredients Overview
The base of Easy Grilled Cheese Roll Ups is simple: sliced bread and cheese. White, whole wheat, or sandwich bread works perfectly; the key is to remove the crusts so the bread can roll easily. Flattening the bread with a rolling pin ensures smooth, tight roll-ups without gaps.
Cheese is the star. Cheddar, American, mozzarella, or even a blend can be used depending on preference. Shredded cheese melts quickly and evenly, preventing clumps. Optional fillings like thinly sliced deli meats, spinach, or tomato slices provide flavor variety and extra nutrition.
Butter or olive oil is essential for a golden, crispy exterior. Lightly spreading or brushing the fat ensures even browning and adds richness. Seasonings like garlic powder, Italian herbs, or paprika can be added to the outer layer for an extra flavor kick.
These ingredients work together to create a snack that’s crunchy on the outside, gooey and savory on the inside, and flexible enough to suit both simple and more elaborate variations. The recipe is quick, easy, and approachable for cooks of any skill level.
Ingredients
6 slices sandwich bread
6 slices cheddar cheese (or cheese of choice)
2 tablespoons butter, softened
Optional fillings: ham slices, turkey slices, spinach leaves, tomato slices
Optional seasonings: garlic powder, paprika, Italian herbs
Step-by-Step Instructions
- Begin by prepping the bread. Remove the crusts and use a rolling pin to flatten each slice evenly. This helps create smooth, tight roll-ups without tearing.
- Place a slice of cheese in the center of each flattened bread slice. Add optional fillings such as ham, turkey, or spinach if desired.
- Carefully roll the bread from one edge to the other, enclosing the cheese and fillings. Pinch the seam slightly to seal.
- Preheat a skillet over medium heat and add a small amount of butter or oil to coat the pan. Alternatively, use a nonstick pan for less fat.
- Place the roll-ups seam-side down in the skillet. Cook for 2–3 minutes per side, or until the bread is golden brown and crispy, and the cheese has melted inside. Adjust heat as needed to prevent burning.
- Remove from the skillet and let rest for a minute to firm up slightly, ensuring the cheese stays inside when biting.
- Optional: sprinkle with garlic powder, paprika, or Italian herbs for added flavor. Serve warm with ketchup, marinara, or your favorite dipping sauce.
Common mistakes include overfilling, which can cause cheese to leak during cooking, or using too high heat, which browns the bread before the cheese melts. Medium heat and moderate fillings ensure perfect results.
Tips, Variations & Substitutions
For a fun twist, add cooked bacon, sliced jalapeños, or a thin spread of cream cheese inside the roll. Gluten-free bread or plant-based cheese can be used for dietary needs. You can also bake the roll-ups at 375°F (190°C) for 10–12 minutes for a hands-off approach.
For extra crispiness, brush the outside with a thin layer of butter or olive oil and sprinkle lightly with Parmesan cheese before cooking. Serve as finger food at parties, a quick lunch for kids, or a cozy snack for movie night.
Serving Ideas & Occasions
Easy Grilled Cheese Roll Ups are ideal for quick lunches, snack times, or casual dinners. Pair with tomato soup, fresh vegetables, or a small salad for a balanced meal. They are also perfect for school lunches or after-school snacks, offering a handheld, kid-friendly treat that’s easy to prepare and fun to eat.
These roll-ups are versatile and can be served hot for gooey enjoyment or slightly cooled for portability. They also make an engaging appetizer for game nights or casual gatherings, allowing guests to enjoy warm, cheesy bites without utensils.
Nutritional & Health Notes
This snack provides carbohydrates from bread, protein and calcium from cheese, and optional nutrients from added vegetables or meats. Using whole-grain bread increases fiber content, while moderate cheese portions provide richness without excessive fat.
Optional fillings like spinach, tomato, or lean meats enhance nutritional value by adding vitamins and minerals. Cooking with minimal butter or using an air fryer can reduce added fat while maintaining crispiness. Overall, these roll-ups are a satisfying and balanced snack that is both indulgent and adaptable for healthier variations.
FAQs
Can I make these roll-ups ahead of time?
Yes, you can prepare and roll them in advance. Store in the refrigerator and cook just before serving for best texture and melted cheese.
Can I freeze them?
Absolutely. Assemble the roll-ups, wrap individually, and freeze. Cook directly from frozen in a skillet or oven, adding a few extra minutes to the cooking time.
What cheeses work best?
Cheddar, American, mozzarella, or a blend melts well and provides a classic grilled cheese flavor. Cream cheese can be added for extra creaminess.
Can I make them vegetarian?
Yes, omit meat fillings or replace with roasted vegetables, spinach, or mushrooms. Cheese and vegetables provide plenty of flavor and satisfaction.
How do I prevent them from falling apart?
Flatten the bread evenly and roll tightly. Pinching the seam slightly and cooking seam-side down first helps keep everything intact.
Can I bake them instead of pan-frying?
Yes, bake at 375°F (190°C) for 10–12 minutes or until golden and crispy. This is a hands-off alternative to skillet cooking.
What dipping sauces pair well?
Tomato ketchup, marinara sauce, ranch, honey mustard, or spicy aioli all complement the cheesy roll-ups perfectly.
PrintCheesy Grilled Cheese Roll-Ups Perfect for Kids and Adults
Easy Grilled Cheese Roll Ups are crispy, gooey, bite-sized sandwiches filled with melty cheese and optional fillings, perfect for snacks or quick lunches.
- Prep Time: 10 minutes
- Cook Time: 6 minutes
- Total Time: 16 minutes
- Yield: 6 roll-ups 1x
Ingredients
6 slices sandwich bread
6 slices cheddar cheese (or cheese of choice)
2 tablespoons butter, softened
Optional fillings: ham slices, turkey slices, spinach leaves, tomato slices
Optional seasonings: garlic powder, paprika, Italian herbs
Instructions
- Remove crusts from bread and flatten slices with a rolling pin.
- Place cheese and optional fillings on bread.
- Roll bread tightly, pinch seam to seal.
- Heat skillet with butter or oil; cook roll-ups 2–3 minutes per side until golden and cheese melts.
- Let rest 1 minute and sprinkle seasonings if desired. Serve warm.
Notes
Use medium heat, moderate fillings, and cook seam-side down first for best results.